Icy Crevasse – Tips and Tricks
I was very excited when I saw there would be a Forochel skirmish. First off, I was thrilled that I finally had another way to earn reputation with the Lossoth, which have an incredibly long grind. Secondly, I just love Forochel. It is one of the most beautiful and deadly places in Middle-Earth.
I tried it out on Bullroarer with my level 65 Hunter, Geldarion, first. I have since tried it with most of my characters that are the appropriate level. I usually run with an on-level soldier, and I would highly recommend that, because this is undoubtedly the hardest skirmish there is.
I would like to give a few tips on completing this skirmish, since it is so difficult. This is not too detailed, and I am sure that Pineleaf Needles at Casual Stroll to Mordor will have a complete guide eventually, but this is to tide people over for the time being. You should definitely check out his posts, as they are the best I’ve ever seen on skirmishes.
Here is how to win (or in this case, not die)!
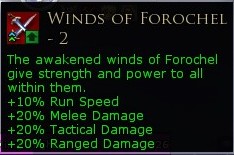
The first time you enter, you will notice that you have a buff called Winds of Forochel (look for an icon underneath your portrait that looks like two crossed swords on a red background). This buff grants you +10% outgoing damage and +5% run speed.
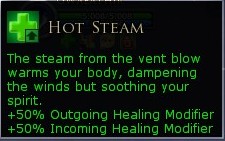
Along the way, you will come to various cracks in the ground like steam vents. If you stand on these, you will get a buff called Hot Steam that replaces the Winds of Forochel buff. The fact that it replaces the other buff is important, so remember that.
As you progress through the skirmish, you will notice that the Winds of Forochel buff gets more potent, eventually reaching +50% outgoing damage. The Hot Steam buff remains the same throughout the skirmish.
Here is why this skirmish is so hard: all of the mobs in the skirmish also get the buffs!
This means that each mob, if they are not standing in the vent, is doing 10-50% more damage than normal. This makes the skirmish very hard if you wear light armor and do not mitigate the damage, not to mention keeping soldiers and pets alive when they are taking that kind of damage.
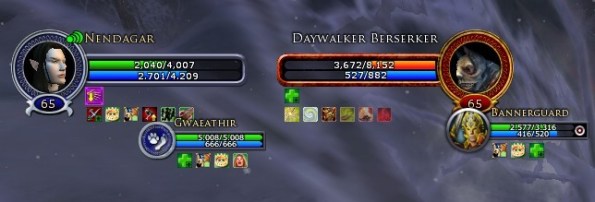
Thus, my main method for getting through these skirmishes in one piece is to position myself so I am in the damage buff zone, but my opponent(s) are in the vent (or as many as possible). As long as they do not heal themselves, which is seldom on normal and swarm mobs, they are getting no benefit, as the Winds of Forochel buffs do not remain on the mob if they stand in the vent, same as with you.
For the final battle, you face off against two elites…on tier 1 solo, even…this is ridiculous. Luckily, only one activates at a time at first, but once they are around 20% health, you have to fight both. My strategy here is to use crowd control on the mammoth and kill the Angmarim first, simply because the Angmarim causes more issues than the mammoth. Again, positioning is key.
Hope this helps and good luck,
Geldarion


